

Timber Sale Setup
Overview
In the following instructional, the steps in which to setup a Timber Sale will be outlined, beginning in Spatial Ai and finishing in Office.
Need More Help?
For personalized assistance tailored to your specific needs, speak with a knowledgeable customer service representative.
Workflows
Timber Sale Setup
Step 1: Beginning in Spatial Ai, add the “Stands” layer for the property you wish to work with.
Step 2: Navigate to the Stand you would like to include in your sale.
- If this Stand requires any edits, complete them before proceeding.
Step 3: With the Stand selected, right-click within the map frame and select “Prescribe Silvicultural” from the menu.
- Prescriptions can also be accessed from the Attributes form that is also located within the right-click menu.
Step 4: Next, select the sale type from the dropdown menu. Then, within the dropdown menu, select “Logging”→“Clearcut”→“Ground”.
- For this example we are prescribing a clearcut.
Step 5: Select “OK” at the bottom to confirm your selection.
- This should populate data in the details grid.
Step 6: Now, review the data that populated the “Details” tab to ensure the estimate is reasonable.
Step 7: Foresters Estimate is pre-populated with current inventory, if available.
- If no inventory exists for this stand in Spatial Ai, you will need to enter the anticipated harvest volume expressed in units per acre based on one of the following:
- (a) Pre-harvest inventory, if one exists, or
- (b) Experience with similar stands
Note: Consider including the Big 5 inventory products even if they do not exist in the current inventory. This will facilitate the mapping of depletion in later steps.
Step 8: Review entries and select “OK” in the bottom right.
Step 9: Select “Yes” when asked to save changes.
Step 10: If a Datamover client was installed, make sure it runs to send out the new prescriptions to S2 BOSS Activity Manager.
- If you are not a stand-alone user, the data is updated in the database every 60 seconds.
The remaining steps will be completed in Office.
Step 1: Navigate to and login to Silvics Office.
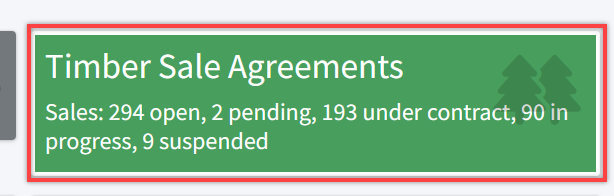
Step 2: On the dashboard, select “Timber Sale Agreements”.
Step 3: Next, click “Add Sale Agreement” in the upper right corner (in red).
- You can also click “List Available Spatial Ai Logging Activities” (in blue).
- This will display all available prescriptions for setting up a timber sale. If you do not see the prescription you are looking for, check to ensure it is prescribed correctly in Spatial Ai.

Step 4: Enter Sale Agreement header information.
- Typing in a blank field will filter results based on what has been enterd so far.
- Timber Sale Agreement names will auto-populate using the following pattern:
- First three letters of organization name – “ABC”
- Org Key – “123”
- Year – “25”
- (Consecutive) Next available number that year – “0001”
- It cannot be edited. The Timber Sale Agreement is a one-to-one relationship with an external Timber Sale Contract.
- Select Buyer, Sale Type, and Harvest Type from the dropdown box.
- If you do not see the option you need, request that the Portfolio Manager add it to the data table and make it available.
- Sale Group and Seller are available if Timber Sale Agreements need to be grouped for reporting purposes but are not required.
Note: A Timber Sale Agreement can only have one Sale Type and one Harvest Type. Users should NOT combine different harvest types in a sale. The data update for Spatial Ai and any sales analysis by harvest types down the road will be wrong.
Step 5: Enter the Agreement Date and Expiration Date. Expiration date can be edited and the original expiration date will be saved.
Note: Dates and Buyers can be changed as long as the sale has NOT been executed, i.e. Mark as Under Contract.
Step 6: After the initial Timber Sale Agreement date is entered, click “Save and continue editing”.
Note: Timber Sale Agreements can be set up before contract execution. They can be deleted if they are never executed i.e. Marked as Under Contract.
- To delete an unexecuted Timber Sale Agreement, all associated sales, product contracts, destinations, and LoadBOSS users must be deleted first.
- After the data is removed, a red trash can will appear at the bottom of the page.
Step 7: Moving down to the “Sales” section, click “Import” above the table.

Step 8: Click on the appropriate row to select a prescription and select all the prescriptions associated with the sale.
Note: While multiple prescribed activities can be combined in one sale, sales must be contained within one county.
Step 9: Once all prescriptions have been selected, click “Import Selected Activities”.
- The Sale Agreement Target Price defaults to “Recalc and Replace All Volumes”.
- Additional prescriptions can be added to the Timber Sale and these volumes are imported if a Forester’s Estimate is available in Spatial Ai.

Note: They are imported by Species Group and Product Group, i.e. Pine Pulpwood, not Loblolly Topwood.
- Multiple Timber Sales can be created for a single Sale Agreement. The sale name will default to the following:
- First three letters of Org – “ABC”
- Year – “25”
- Sale Type – “PAC” (Pay as Cut)
- Harvest Type – “THN” (Thinning)
- Buyer – “BuyerName”
- Sale Sequence Number – “1”
- However, unlike the Sale Agreement number, the Sale Name can be edited for a different naming convention.
- Until the Sale Agreement is Marked as Under Contract, additional Timber Sales can be added. If additional Timber Sales are needed after the Timber Sale Agreement is executed, a new Timber Sale Agreement must be created.
Step 10: Update the Forester’s Estimate
- On the “Update Sale Agreement” page, click Foresters Estimate directly above the “Sales Table”.
- The sum of the Spatial Ai Forester’s estimate for all sales will update the Forester’s Estimate in Office.

- Clicking on an estimate will allow you to edit and update the estimate.
- Depletion Product can be edited overriding the Forester’s Estimate.

- Additional Depletion Products not imported from the Spatial Ai prescription can also be added to Forester’s Estimate by clicking the plus (+) symbol at the top on the page.
Note: Multiple decimals are available to help reconcile to Timber Sale Contract pricing.
- The Depletion Product drop down selection box (to the right) is table driven and can be customized according to Tenant, but not organization or property.
- The Target Volumes and Revenue are used to compare estimates, budgets, minimums, etc., to the final contracted price.
- This setup can be done well in advance of the sale’s execution.
- If the sale is never executed, it can be deleted.
Note: When deleting a Sale Agreement, sales associated with it must first be removed before they can be deleted.

Step 11: Once a timber sale is negotiated or bid out, the final buyer products are entered into the Product Contract.

- To add a new Product Contract, click the plus (+) symbol in the upper right.
- The available Product Contract(s) will be filtered by those available for the Buyer.
- Product Volume and Product Rate is entered for the Buyer Product.
- The Effective/Expiration Date defaults to the same as the Timber Sale Agreement.
- However, any individual Product Contract can have a unique Effective/Expiration date.
- Similarly, if a new Product Contract is needed after execution of the Timber Sale Agreement, it can be added.

- If the Buyer Product is not available in the drop-down menu then it needs to be added to the Buyer Product table found underneath the “Timber Sales” section in the menu on the left side of the window.
- In the Buyer Product table, you are able to filter by Buyer only showing products available for that specific Buyer (in red below).

Step 12: Allocation for Accounting (three separate allocation windows must be completed):
- The account code selected will determine how the quantity and dollars are reported to the external financial system, Odoo, and the budget reports.
- The Product Contract can be allocated to one-to-many Accounts.
- Example: If the Buyer Product of Pine Canterwood is allocated 75% to Chip-n-Saw and 25% to Pine Pulpwood. Meaning for every load of Pine Canterwood, 75% of its total volume and total revenue will be reported as Chip-n-Saw and the other 25% as Pine Pulpwood.

Step 13: Allocation for Reporting:
- This allocation affects how the timber sale volume and revenue are posted to outside price reporting services.
- Currently, the default is TMS, but this will be modified in the future to assist in automatic reporting services.
Step 14: Allocation for Inventory:
- This reflects what specie/product group the Product Contract represents and will be used primarily to analyze the harvest against the Forester’s Estimate. (Note: It does NOT modify the Spatial Ai inventory in anyway.)
- Once all product contracts are entered, the total should reflect the expected revenue from the sales contract. (Note: Please use decimals to ensure that the totals reflect his expected revenue.)
Step 15: Modifying Buyer Products
- After the Timber Sale Agreement is “Marked as Under Contract,” the following Buyer Product fields CAN NOT be edited:
- (a) Buyer
- (b) Buyer Product
- (c) Effective Date
- The product rate and expiration date can be edited.
- A new Buyer Product can also be added anytime after the Timber Sale Agreement is executed.
Note: After modification of any Buyer Product data, use the “Sync to LoadBOSS” action button to assure that LoadBOSS is updated.
Step 16: Enter Destinations

- The forester needs to select all possible delivery Destinations for the corresponding Sale Agreement.
- This information will form the Mill pick list that the logger sees in LoadBOSS Ai.
- If you do not see the mill, you can add it to the Destination table or request that it be added.
- The Code is shorthand, while the Display Text should follow this format:
- Mill name in standard casing – “Mill Name”
- City in all upper case – “MYCITY”
- State abbr. in all upper case – “AL”
Note: In the future the Mill Database ID number will be available to help reconcile the two databases.
Step 17: Enter LoadBOSS Users
- You should select LoadBOSS users during the timber sale setup if you know.
- This can be added after the Timber Sale Agreement is executed BUT the “Sync with LoadBOSS” button must be run to updated the LoadBOSS portal.
- Ensure to assign yourself to the Timber Sale Agreement, as well as the Logger and Portfolio Manager, and any other user needing access to this sale in the LoadBOSS portal.
Note: Office does not automatically assign timber sales to LoadBOSS users even if they have permission to see the Org/Property associated with the Timber Sale Agreement. This can, of course, be assigned in the LoadBOSS portal.
Step 18: Execute the Timber Sale Agreement
- Use the “Mark as Under Contract” button (circled in red) to execute a Timber Sale Agreement. The system will warn you that it can’t be deleted after this!

- The system will confirm that a sales order has been created in the external financial program, Odoo.
- If it cannot be made it will provide an error message.

Step 19: Enter Timber Sale advances as needed
- Use the Advance/Deposits button (circled in red) to record the Advance Date and Advance Amount.

- When the advance is saved it will create an accounts receivable record in the external financial system, Odoo.
Step 20: Enter Lump Sum Sale Payments
Step 21: Assign Security tickets
- Once the Timber Sale Agreement has been Marked as Under Contract, the Security Tickets (Tags) field changes from NA to Manage.
- Use this field to create Security Tickets for each Timber Sale.
Note: If you would like to differentiate between removals or loads among unique stands, those stands must be set up as a sale by themselves.
- Use the “Add Tickets +” button to assign tickets.
- Enter the desired number of tickets (this number must be divisible by 3).
- Once created, click on the row with the tickets to print or mark as complete.
- You are able to continue to add security tickets as needed.
Step 22: Sync Office Timber Sales with LoadBOSS Ai
Step 23: Creating Sale Amendments
- Timber Sales can continually be added to a Timber Sale Agreement if it is either “Under Contract” or “In Progress”.
- Once marked “Completed in Field” or “Completed” they can no longer be added.
Step 24: Upload Timber Sale Documents
- The following documents should be loaded before a sale can be “Marked as Under Contract”:
- Contract
- COI
- Amendment
- Performance Deposit Hold & Close Sale
- Performance Deposit Return Letter
Step 25: Post Sale Execution – IN DEVELOPMENT –
- External Sale Order – Created in Odoo
- Lump Sum – creates the sale removal, no need to post via LoadBOSS Ai
- Status Update
- Currently manually updating Office
- Proposed Procedure – Inspection will update status and percent complete.
- Inspections
- Currently manually entered
- Future: link to Inspector App
- Monitoring Loads
- Currently reconciling available reports between Office, LoadBOSS Ai, and Analytics for inconsistencies
- Future: Monitor on Analytics?
- Closing a Sale
- Currently manually communicating
- Future: When status changes to Complete in Field, email sent to external username login, i.e. clientaccounting@email.com.
- Future: When accounting reviews timber sale, update office accordingly?
- Also working on trigger for updating Spatial Ai
Step 26: Deleting Timber Sale Agreement Data
Step 27: Timber Sale Reporting
Step 28: Monitoring Timber Sale Loads