Run the Mixed Stand Thinning Mode
Overview
In this step of the Harvesting workflow, we will use the Mixed Stand Model to estimate the removals for partial harvest. There are four primary steps to running the model, display the screen for the model, change the parameters if need, run the model and verify the results, save the results back to the logging activity. Let’s walk through that process now.
Need More Help?
For personalized assistance, speak with a customer service representative or join our monthly training session.
Workflows
Pre-Work: Ensure the Layer is Visible, Selectable, and Editable
Step 1: In the Map TOC tab of the Spatialai Explorer Module, right click on the name of the layer. A context menu will appear.
Step 2: If the layer is not Visible, Selectable, or Editable (not highlighted green in the context menu), click the empty checkbox to the left of the words (all three should be highlighted green in order to continue the workflow). The context menu will close and the layer is now visible, selectable, and editable.
Running the Mixed Stand Thinning Mode
Step 1: In the Map View, select the feature you wish to prescribe a harvesting activity to. Use the selection tool to single click the feature of interest. The selected feature, once properly selected, highlights.
Note: If you have multiple coincident layers that are selectable open, the Select Feature dialog window will open and you will need to select which layer the feature you are trying to select is in.
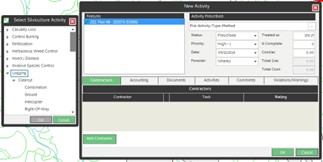
Step 2: Right click on the feature and select “Explore” then select “Prescribe Silvicultural” from the popup menu dialog. The “Select Silvicultural Activity” and “New Activity” dialog windows open.

Step 3: In the “Select Silvicultural Activity” dialog window, Set the following:
- Activity = Logging
- Type = Thinning
- Method = Operator Select
- Select
- Click <OK>
The “Select Silvicultural Activity” dialog window closes when the user clicks <OK>. In the “New Activity” dialog window, the Activity Prescribed field populates with the Activity-Type-Method selected.
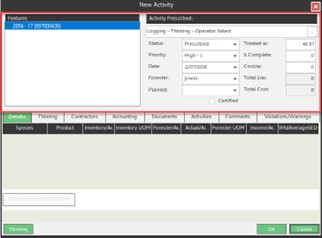
Step 4: In the “New Activity” dialog window’s form header (the top half of the form), set the prescription attributes:
- Status = Prescribed
- Priority = “Moderate-2”
- Date = yesterday’s date (Note: The date field defaults to today’s date)
- Forester = your user name
- Treated Acres = The stand acres (This should be pre-populated for you )
- % Complete = 0
- Cost/ac = 0.00
- Certified = unchecked

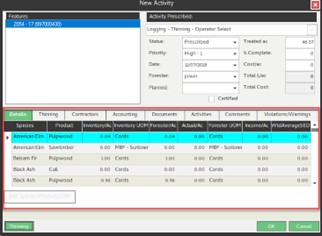
Step 5: In the “New Activity” dialog window’s child tab area (the bottom half of the form), select the Details tab. The Details tab will not be populated until the Thinning button is pressed and the model is run. The selected row within the details grid highlights blue (Note: The first row is selected by default).
Note: Be sure to use the scroll bar on the right of the details tab to see all associated Species/Products for the selected feature.
Step 6: Below the Details grid, press the <Thinning> button. This will display the screen for the model available for this stands Cover Type / Origin combination.
Note: If more than one model is available, you will be prompted for which model you wish to use.
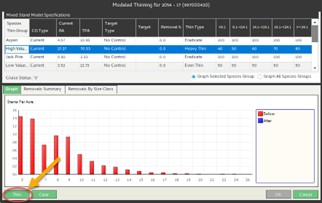
Step 7: When the Mixed Stand Thinning Model form is displayed, you may either accept the defaults or in the upper part of the form you can use the “Thin Type” column to choose a different set of percentages to use for the DBH distribution for the species in the rows “Species Thin Group.”
Step 8: If no adjustments to the model specifications are needed, or after you have made the necessary adjustments, press the button in the bottom left and corner of the screen.

Step 9: Review the results for each “Species Thin Group” by selecting a row in the grid in the top half of the screen.
Step 10: At the bottom right of the Mixed Stand Thinning Model dialog window, click the <OK> button to save your results back to the New Activity dialog window or go back to step seven to adjust the specifications of one or more of the “Species Thin Group” rows.


