
Create a Page Layout Map
Overview
This guide walks users through creating a page layout map within the Silvics mapping module. Through these steps, users learn how to assemble map frames and other layout components into their template, enabling polished, print-ready map outputs.
Need More Help?
For personalized assistance tailored to your specific needs, speak with a knowledgeable customer service representative.
Workflows
Creating a Page Layout Map
Step 1: In the ribbon, select <Page Layout>.
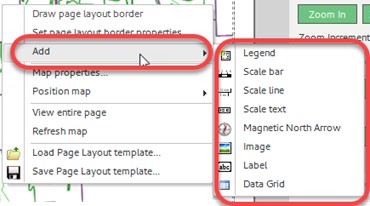
Step 2: Right click in the map and select “Add” in the context menu.
Step 3: In the “Add” sub-menu, select the following elements to add to the map:
- Legend
- Scale Bar
- Scale Text
- An Image (company logo)
- Label (Title)
Note: We will discuss adding data grids in a separate document.
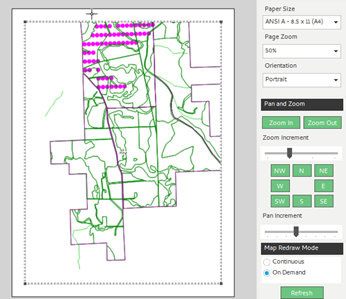
Step 4: Elements can be freely moved about the page by clicking and dragging the element while the move cursor is over the element.
Note: The move cursor is two double sided arrows intersecting at a right angle.
Step 5: Elements can also be resized after selection by clicking and dragging on the square, black corner nodes.
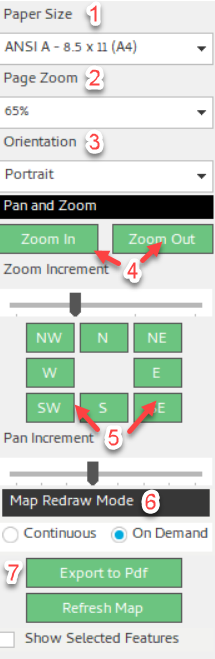
Page Layout Panel Overview
1. Paper Size offers ANSI A through ANSI E sizes to fit a wide variety of use cases.
2. Page Zoom controls the view of the Page itself.
3. Orientation controls whether the Page Layout is portrait or landscape.
4. Zoom In/Out controls the View Frame of the map.
5. Pan the View Frame in one of the four Cardinal or Intercardinal directions.
6. Map Redraw Mode determines whether the map is updated as changes are made or updated manually.
7. Export to Pdf converts what is seen in the View Frame into a Pdf for printing or sharing.