Labeling Workflow
Overview
In this workflow, we will add labels to features in the survival check feature class, displaying key attributes like feature names and survival rates to enhance map readability. Detailed step-by-step instructions will guide you in selecting labeling settings and customizing their appearance and placement.
Need More Help?
For personalized assistance, speak with a customer service representative or join our monthly training session.
Workflows
Labeling
Step 1: In the Map TOC tab of the Explorer Panel, select the layer you want to make labels for. User can select the layer in the Map TOC. Note: In this workflow, we will label the features in the Survival Check layer we created using the Query tool.
Step 2: In the Map TOC, right click on the layer and a context menu will appear. Select Layer Properties. The “Properties for Layer…” dialog window will open.
Step 3: After navigating to the Layers tab of the “Properties for Layer…” dialog window, Users can indicate how they wish to label the features in the layer with the following steps:
- Check the “Label features in this layer” checkbox
- In the Label Field area, select the <Expression> button
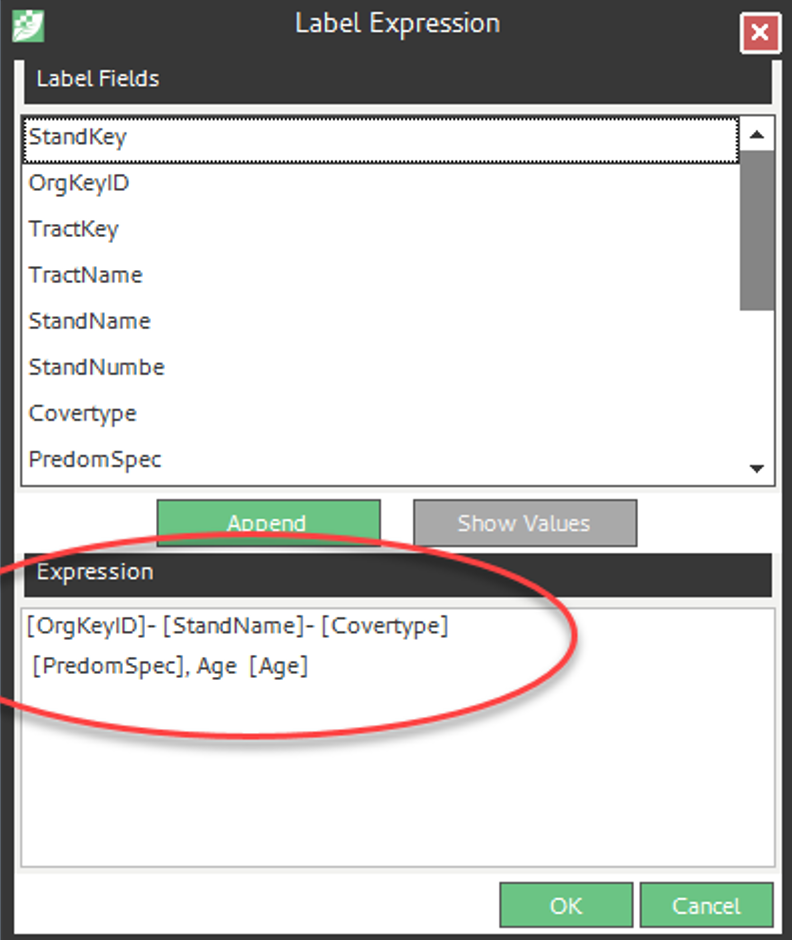
Step 4: In the Expression frame of the dialog window, enter the following:
[OrgKeyID]- [StandName]-[Covertype]
[PredomSpec], Age [Age]
On the Label Expression dialog window, click <OK>. The Label Expression dialog window will close.
Note: Use the <Enter> key after “covertype” to move to a second line on the label.

Step 5: In the Text Symbol frame of the Properties for layer dialog window,
- Change the font and font size
- Select the “B” for bold
- Check the “Draw Halo” checkbox
Note: The left-side window displays how the text will appear on the layer.
Step 6: In the Label Options frame of the Properties for layer dialog window,
- Set the Overlapping Rule to “No Overlapping”
- Check the “Place label inside polygon” checkbox
- Check the “Label all polygon parts” checkbox
Step 7: In the “Properties for Layer…” dialog window, click <OK> to close the window. The features in the selected layer are labeled as defined.
Note: Users may have to zoom in to view the labels.

