How To Work With An Image Catalog
Overview
An Image Catalog allows the users to group together images and display them in the View Frame. The Image Catalog in Spatial ai allows you to keep images at your fingertips and quickly turn them on and off for increased speed and convenience. You have the ability to create multiple Image Catalogs which can help with organization of your image files.
Need More Help?
For personalized assistance, speak with a customer service representative or join our monthly training session.
Workflows
Create a New Image Catalog
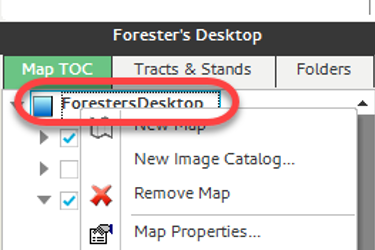
Step 1: In the Map TOC Tab, right click on the Map Data Frame and select “New Image Catalog” from the context menu. The New Image Catalog dialog window opens. (grab Image)
Step 2: In the New Image Catalog dialog window, give the image catalog a name by typing into the Image Catalog Name field.
Step 3: In the New Image Catalog dialog window, Add Images to the Image Catalog by clicking the <Add Image> button. A Windows Explorer window will open.
Step 4: In the Windows Explorer window, navigate to a folder and select the image(s) you wish to add to the Image Catalog.
Step 5: Once all images have been added to the list, click the <OK> button. The selected image shows in the New Image Catalog dialog window.
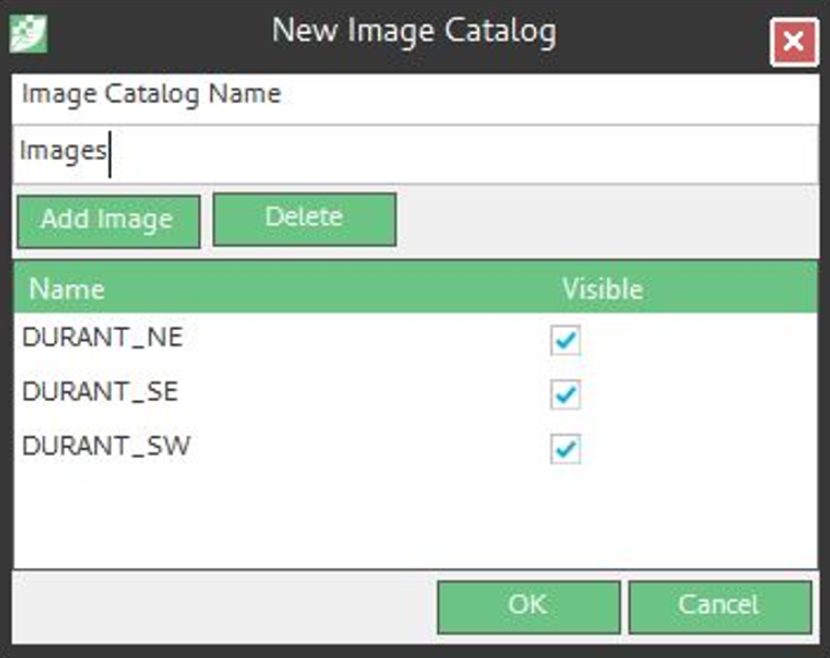
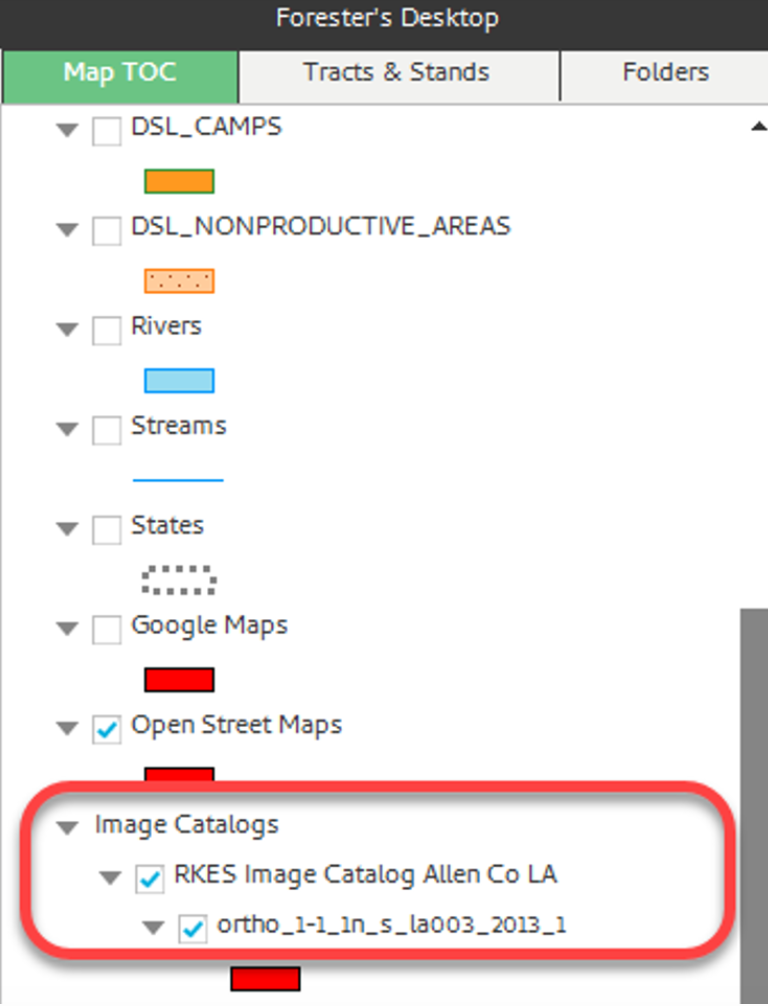
Step 6: In the New Image Catalog dialog window, click <OK>. The New Image Catalog dialog window closes and the Image Catalog group layer is added to the Map TOC tab in the Map Explorer pane.
End Results:
Open an Existing Image Catalog
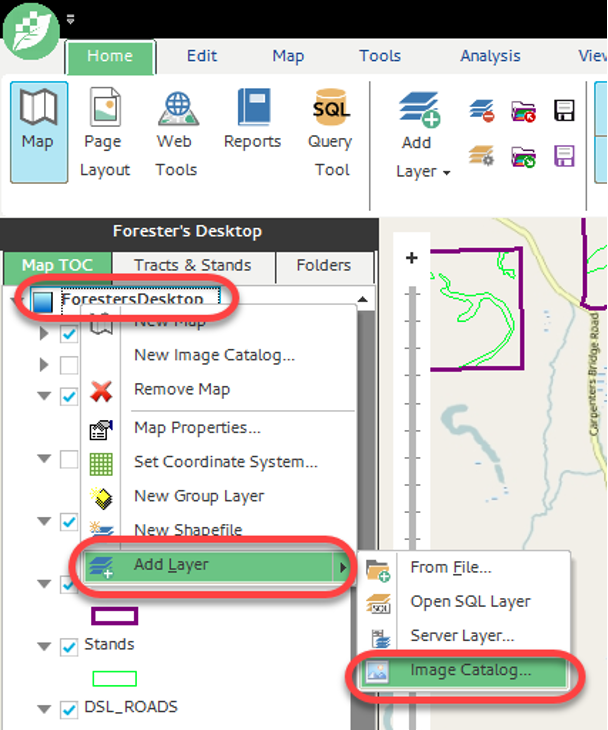
There are two ways to open an existing Image Catalog in Spatial AI: from the Map Explorer and from the Home Ribbon.
From the Map Explorer:
- In the Map Explorer, select the Map TOC tab.
- On the Map TOC tab, right click on the Map Data Frame.
- Select “Add Layer” from the Context menu.
- Select “Image Catalog…” from the Context sub-menu.
From the Home Ribbon:
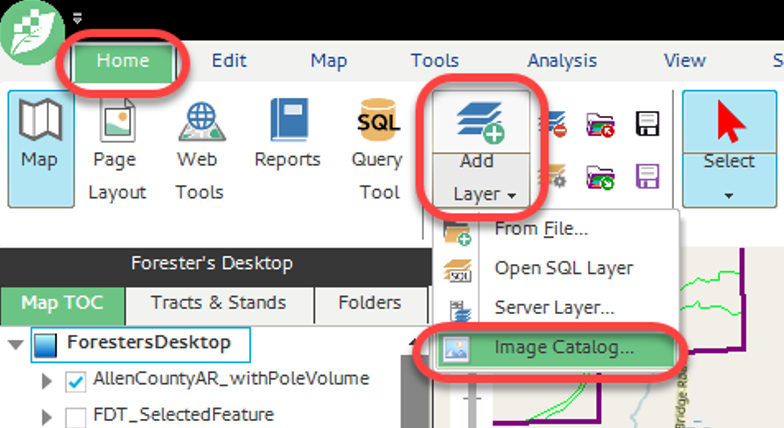
- In the Home Ribbon select the “Add Layer” drop down.
- Select “Image Catalog…” from the list of available layer types.
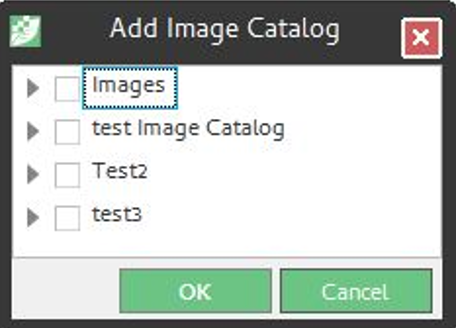
- Select the Image Catalog you wish to open.
Note: If the list in the Add Image Catalog dialog window is empty, you do not have any saved catalogs and will need to create one (as described above).
Edit an Open Image Catalog
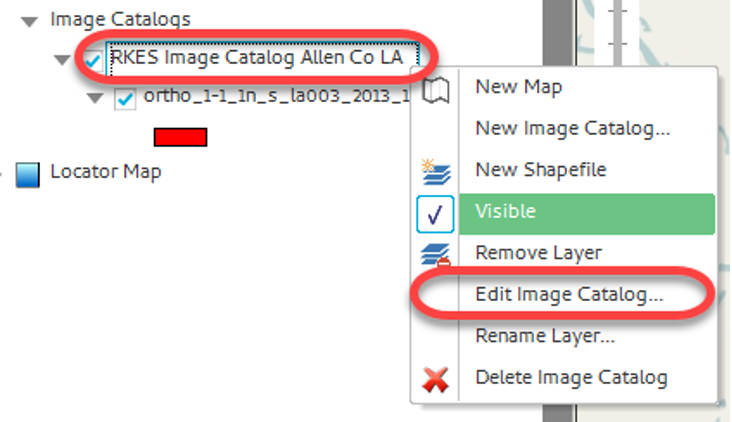
Step 1: Open the Edit Image Catalog dialog window by right clicking, in the Map TOC Tab in the Map Explorer pane, on the Image Catalog you create. In the context menu, select “Edit Image Catalog…”
To change which images are visible within the catalog:
- Check the Visible checkbox beside images you wish to be visible.
- Uncheck the Visible checkbox beside images you do not wish to be visible.
To remove images from the catalog:
- Select the image in the list.
- Click the <Delete> button.
Note: you cannot remove all images from a catalog. If you wish to remove all images or to delete the entire catalog, delete the catalog from the right click context menu in the Map Explorer.
To add additional Images to the Image Catalog:
- Clicking the <Add Image> button.
- Navigate to the image(s) you wish to add.
- Select the image(s).
- Click <OK> in the Windows Explorer dialog window.
To rename the Image Catalog:
- Modify the name in the Image Catalog Name field.
Delete an Image Catalog from the Map Explorer
Step 1: Open the Edit Image Catalog dialog window by right clicking, in the Map TOC Tab in the Map Explorer pane, on the Image Catalog you create. In the context menu, select “Delete Image Catalog.”
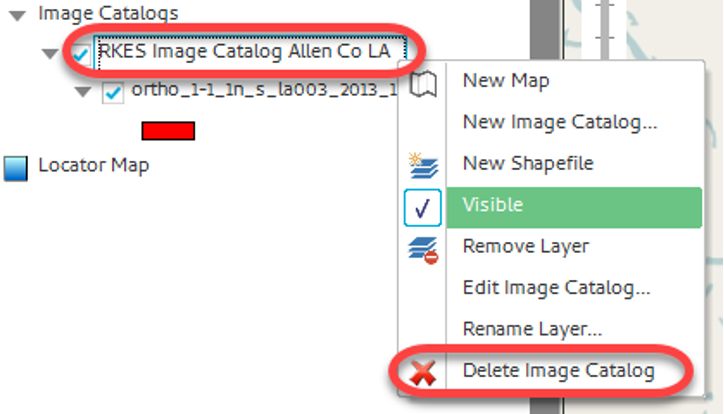
Step 2: Select “Delete Image Catalog” from the context menu. A warning message will open.
Note: This does not “Delete” the image catalog. It just removes it from the working set. You can add the catalog back by following the steps in “Open an Existing Image Catalog” above.
Step 3: Click <Yes> in the warning dialog window. The image catalog is removed from the Map Explorer pane and the associated images are removed from the View Frame.
Turning Image Layers On and Off in an Open Image Catalog
Step 1: On the Map TOC Tab in the Map Explorer pane, navigate to the Image Catalog you created. Image catalog has a check in the box indicating it is visible in the View Frame. Each associated Image has a check in the box indicating it is visible in the View Frame
Step 2: To turn off select images within an image catalog, uncheck the box next to the name of the image you do not wish to see. Image is no longer visible in the View Frame.
Step 3: To turn on select images within an image catalog, check the box next to the name of the image you wish to turn back on. Image becomes visible in the View Frame

