Folders Workflow
Overview
In this workflow, we will prescribe survival check activities for all stands in the Survival Check Layer to systematically monitor their health and progress. Detailed step-by-step instructions will guide you in setting parameters for each stand, such as check frequency and assessment criteria, ensuring proactive management and timely interventions.
Need More Help?
For personalized assistance, speak with a customer service representative or join our monthly training session.
Workflows
Folders Workflow
Step 1: Zoom to the newly created feature in the Survival Check layer.
- Right click the layer in the Map Explorer-Map TOC tab (on the left of the screen)
- Select “Zoom To Layer” in the context menu to open the Select Feature popup
Note: If multiple features exist, open the Table Browser and select a feature then click the Zoom To Selection tool.
Step 2: Change the selected feature to the Stands layer by simply clicking in the layer and click <OK>.
Step 3: Right click in the map view to open the context menu. Select “Explore,” then “Add to Folder.” The Add To Folder dialog window opens to the Org the feature previously selected belongs to.
Step 4: In the Add to Folder Dialog window:
- Select the Org Name for the feature you have selected
- Right click on the Org Name
- Select “New” in the context menu
A new folder appears with the cursor in edit mode to edit the name of the folder.
Step 5: User can edit the folder name. Give the new folder the name “Survival Checks_Your Initials.“ Click the <Save> button. The Add to Folder dialog window closes.
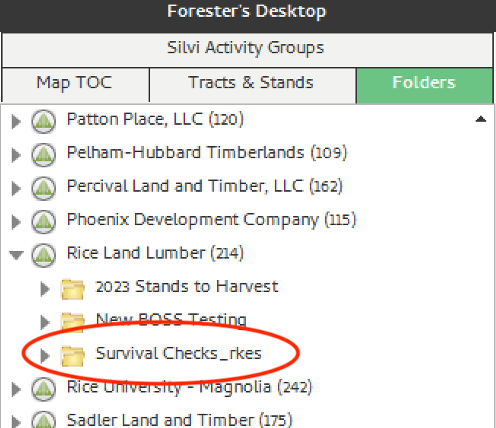
Step 6: In the Explorer Panel, select the Folders tab. Navigate to the Folder created in Step 5.
Step 7: Right click on the folder to open the context menu and select “Attributes”. Verify that the stand(s) previously added are included in the folder.
Note: Repeat workflow to add more stands into the Survival Check folder.


