
Create a Management Activity
Overview
A Management Activity refers to work done on a feature that doesn’t directly impact timber growing or harvesting, such as road grading, culvert placement, or boundary line painting. These activities can be applied to an entire feature or dynamically placed using the Management Activity tool. However, Management Activities are only available for specific feature types, and the options within the prescription form are limited to those relevant to the selected feature class, with some classes not yet having Management Activities set up, such as DSL_Areas_of_Concern.
Need More Help?
For personalized assistance, speak with a customer service representative or join our monthly training session.
Workflows
In this workflow, we will create a Management Activity that will be associated to a stand polygon. This activity will be associated to the entire polygon.
Step-by-Step Instructions
Step 1: In the Map View, select the feature you wish to prescribe activities to by left clicking on the feature using the selection tool.
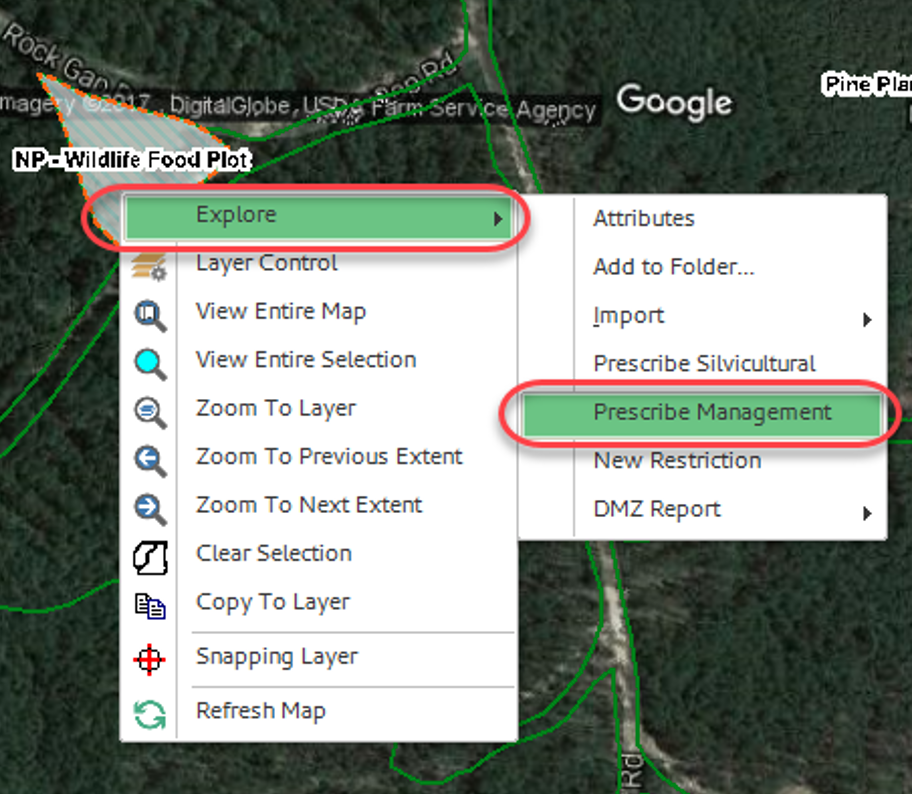
Step 2: Right-click in the map view and select “Explore,” then “Prescribe Management” in the context menu.
The Use Dynamic Segmentation? dialog window opens.
Step 3: In the Use Dynamic Segmentation dialog window, click <No> to prescribe directly to the polygon without using the new dynamic segmentation tools.
The New Activity Window and Select Management Activity windows open. Only Management Activities are visible within the Select Management Activity window.
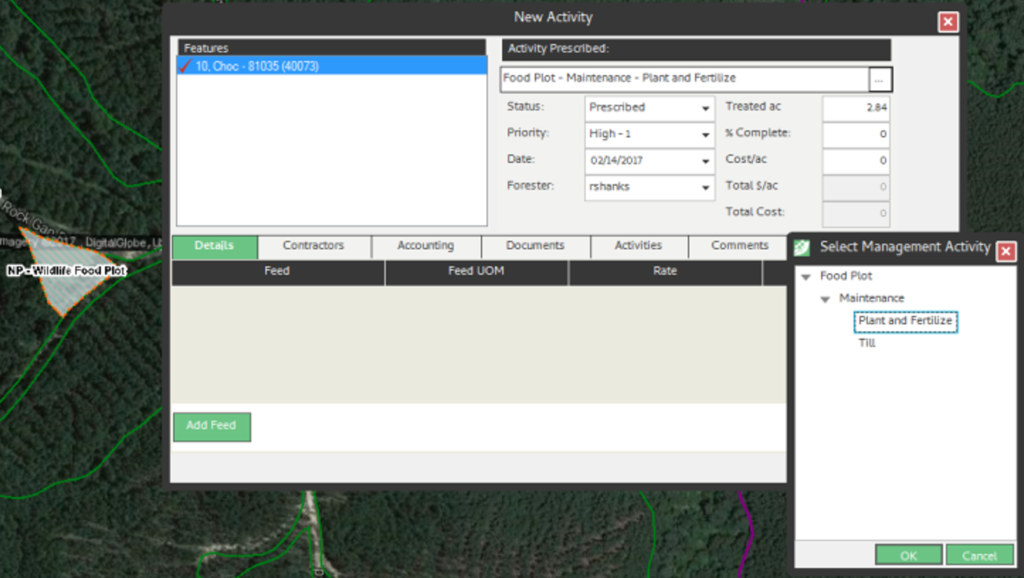
Step 4: In the Select Management Activity dialog window, select the following prescription attributes and fill in the required fields as follows:
- Activity = Food Plot
- Type = Maintenance
- Method = Plant and Fertilize
Click <OK>. The Select Management Activity dialog window closes. In the New Activity window, the Activity Prescribed: field populates with the appropriate Activity – Type- Method.
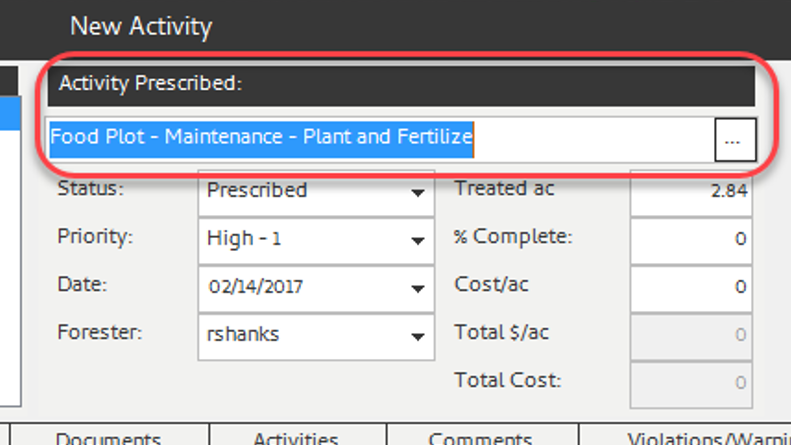
Step 5: In the New Activity window, keep the default attribute settings for Status, Priority, Date, and Forester or modify as desired.
Step 6: In the Details tab, click the <Add Feed> button to add a row to the details grid.
Note: To add additional detail rows to the activity prescription, click the <Add Feed> button again.
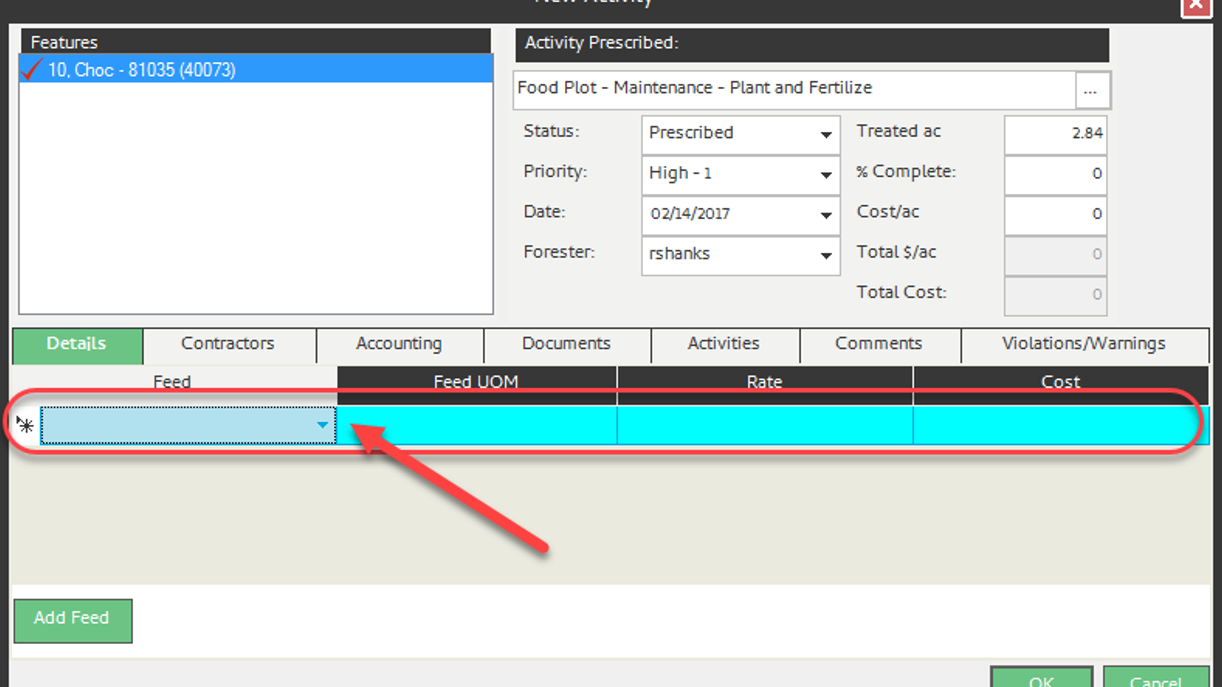
Step 7: In the Activity dialog window details grid, select details for: Feed, Feed UOM, Rate, and Cost.
Note: Total $/Ac and Total Cost fields in the form header calculate automatically once the Rate and Cost fields in the details tab are entered.
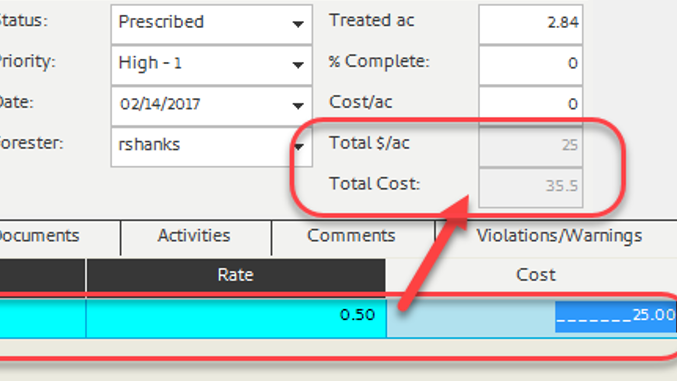
Step 8: In the Activity dialog window, click the <OK> button in the bottom right, prompting the Save changes dialog window to open.
Step 9: In the Save Changes to Activity dialog window, select <Yes>. The Activity form closes and the new activity is saved to the feature.
Verify the Activity Saved Properly
In this workflow, we will review the activity you just created and verify that the details you entered were saved to the database.
Step 1: In the Map View, select the feature you prescribed the management activity to. The selected feature will highlight once selected properly.
Step 2: With the feature selected, right click in the map view and select “Explore,” then “Attributes” in the context menu. The Stand Form opens.
Step 3: In the Stand Form, select the Activities Tab to see all activities associated with the selected feature. The activity you created should be listed in the feature’s history.
Step 4: Double click the management activity in the history list, opening the Activity Window.
Details in the Activity window are as previously specified in the Management Activity Prescription.
Step 5: Review the Activity attributes and details.
Step 6: Close the Activity window and Stand Form.

