
Inventory Import to S2CruiseTally
Overview
This document explains how to import inventory data from Inventory (v7.07 or later, MS Access version) into Silvics Spatial (v2.2.6.x or later), using tree tally data linked to exported Tally plots.
Before starting, ensure the Datamover loop includes the S2CruiseTally database. You’ll need a Inventory MDB with plot-level inventory data processed for import, and you must know which stand(s) in Silvics Spatial the data will go into.
Note: Unlike previous versions, this process requires all cruise plots to be created first and exported to Tally. Once the tally data is captured and processed, it can be imported into Silvics Spatial at the plot level. See “Building and Exporting Cruise Plots” for instructions on using Plot Builder.
Need More Help?
For personalized assistance tailored to your specific needs, speak with a knowledgeable customer service representative.
Workflows
Inventory Import to S2CruiseTally
Step 1: If the application is not already running, start the application.
Step 2: If the Stands layer is not open in the current working set, open the Stands layer for the Organization the Stands belong to that are to have their inventory imported from the Inventory MDB.
Note: This is a two-step process. First, import the Tally data into the S2CruiseTally database. The system will then match Tally plots to the selected stand(s) and use that data to calculate the new inventory. Even if you only select a few stands when importing the Inventory MDB, the Tally data will still be available for all stands in the cruise.
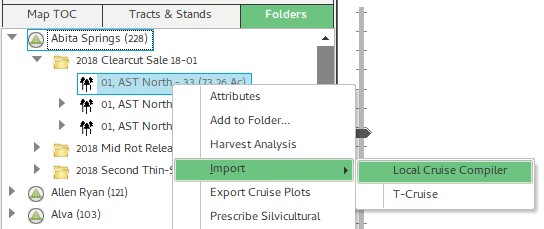
Step 3: Navigate to and select on the map the Stand or Stands you wish to perform the import from Inventory for. You also have the option to locate the Stand or Stands in the “Tract & Stands” tree view or the “Folder” tree view.
Step 4: Note, if the physical location of any of the Tally Plots has changed and you need to edit that physical location you MUST do that before the Tally Plot has Tree level Tally data associated with due to that data being imported from a Inventory MDB. If desired edit those Tally Plots by editing the individual Tally Plots in the Tally Plots layer.
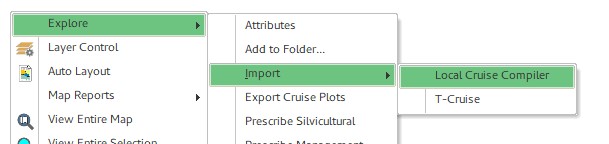
Step 5: Once the stands are selected right click on the map and choose the “Explore | Import | Local Inventory” context menu option.
- If the Stand or Stands are selected in the “Tract & Stand” or “Folder” tree views, then the menu navigation is right click, “Explore | Import | Local Inventory”.
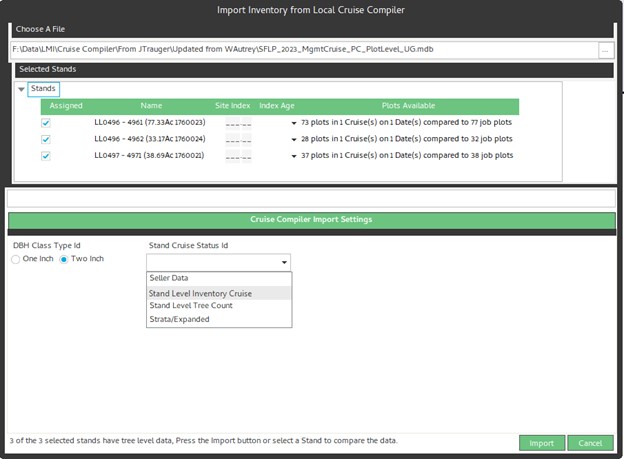
Step 6: Once you have chosen the “Import | Local Inventory” option, the import form will be displayed.
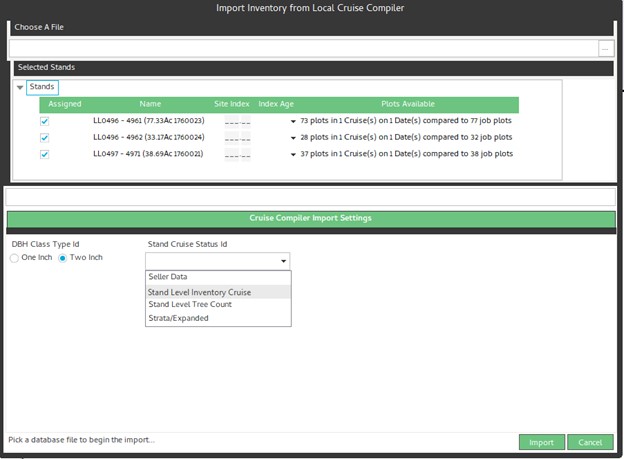
Step 7: Once the form appears, click the ellipsis (…) button under “Choose a File” to locate and open the Inventory MDB you want to import. If the import is successful, the system will check each selected stand to see how many Tally plots fall within it and compare that to the Cruise Plots. If any stand is missing plots, click “Cancel” and check if another MDB contains the missing data. This allows partial cruise data to be used for stands where enough information has been collected.
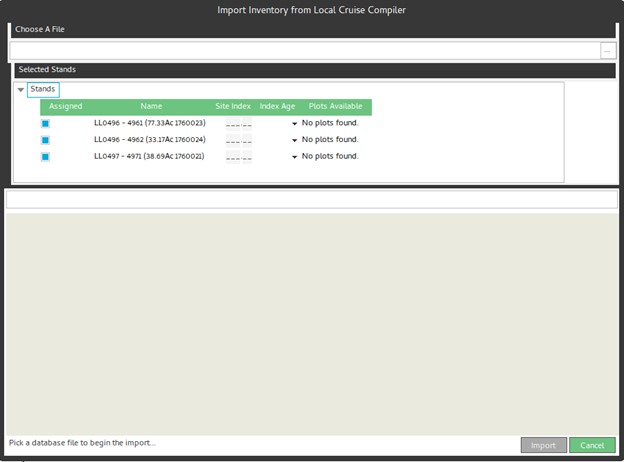
Step 8: If one or more of the Selected Stands has Tally Plots and some or all of those Tally Plots have Tree level Tally data, then the check box in the grid will be checked and the Import button will be enabled. You must also choose an option from the “Stand Cruise Status Id” drop down list before pressing the “Import” button.
Step 9: Press the “Import” button to complete the import process. Once the import process is complete you will receive a confirmation message and the form will close.
Step 10: If there are other Stands that are also in this Cruise whose Tally data is in the Inventory MDB that was just imported, you can repeat the process for those stands without having to choose the MDB file again.
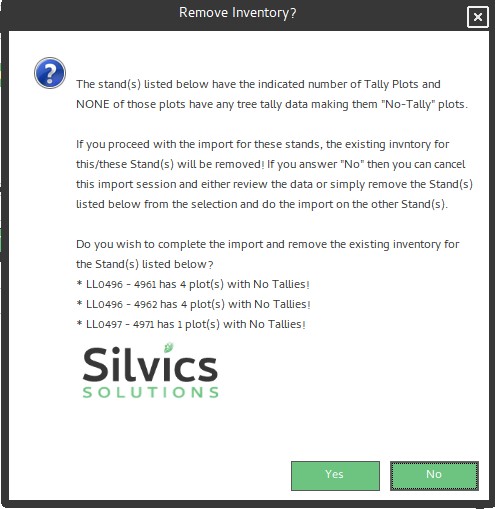
Step 11: You may see a message warning that some Tally Plots have no associated Tree Tally data. You can choose to proceed or cancel and locate another Inventory MDB that may contain the missing data.
Step 12: You can now review each stand individually if needed. The system automatically creates and completes a “Cruise Import” activity, which is recorded in the Activity History tab of the Stand Attributes form.