
Add an Activity to a Sale Group & Timber Sale in Activity Manager
Overview
As a harvesting forester, you will utilize various components of the Silvics 2.0 platform to step through the entire process of creating, updating, and completing the harvest within the system. You will use TimberRx, Forester’s Desktop, Activity Manger, and Harvest Manager as well as some portions of the Budget application.
In the first step of the Harvesting workflow, we created the Activity in Forester’s Desktop. Now, we will associate the activities to a Sale Group and Timber Sale.
Need More Help?
For personalized assistance, speak with a customer service representative or join our monthly training session.
Workflows
Open/Add a Map Layer
First, ensure that the layer is not already open in the Map Explorer by selecting the Map TOC tab in the Map Explorer frame and look for the layer in the list of open layers.
If the layer is absent, add the layer as follows:
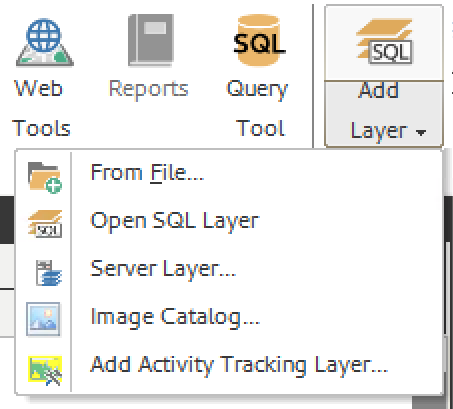
Step 1: Select the “Add Layer” button in the ribbon. Five options will appear in the dropdown menu: “From File…”, “Open SQL Layer”, “Server Layer…”, “Image Catalog”, and “Add Activity Tracking Layer.”
Step 2: Select from the menu which type of layer you want to add. A dialogue window will appear.
Add the Activity to a Sale Group and Timber Sale in Activity Manager
In the second step of the Harvesting workflow, we will combine the two activities we created in step 1 into one Activity Sale Group. This will allow us to create one Timber Sale and/or PO for a sale that contains both of the feature’s harvesting activities.
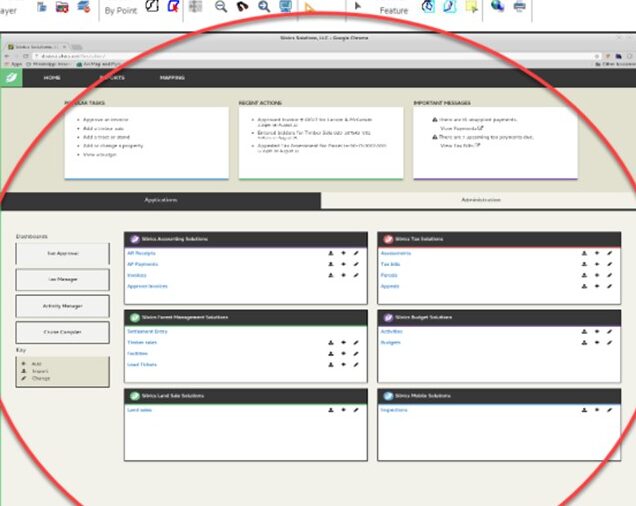
Step 1: In the ribbon, Select the Web Tools button (If prompted, log in to the web tools window). The Silvics Web Tools site launches in the View Frame.
Step 2: In the Dashboards section of the Web Tools window, select “Activity Manager.” The Activity Manager web form opens.
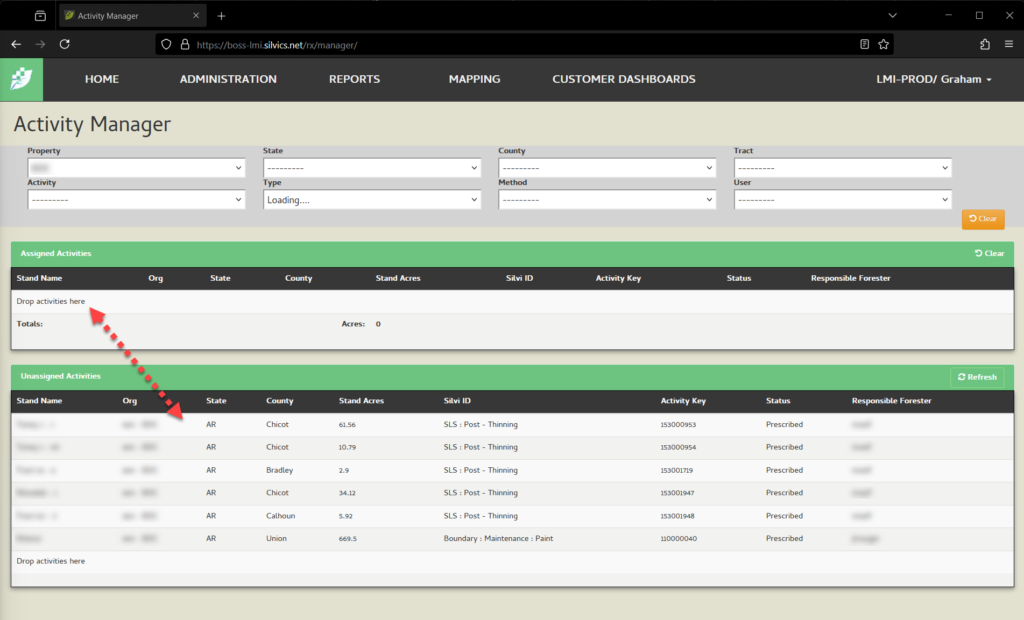
Step 3: In the Activity Manager web form, all activities that have not been assigned to an Activity Sale Group are listed in the “Unassigned Activities” section (bottom grid).
Filter the Unassigned Activities to reduce the number of activities showing in the results:
- Set the Property parameter to the Property the selected feature is on.
- Set the Activity parameter to “Logging.”
- If needed, set the User parameter to your username.
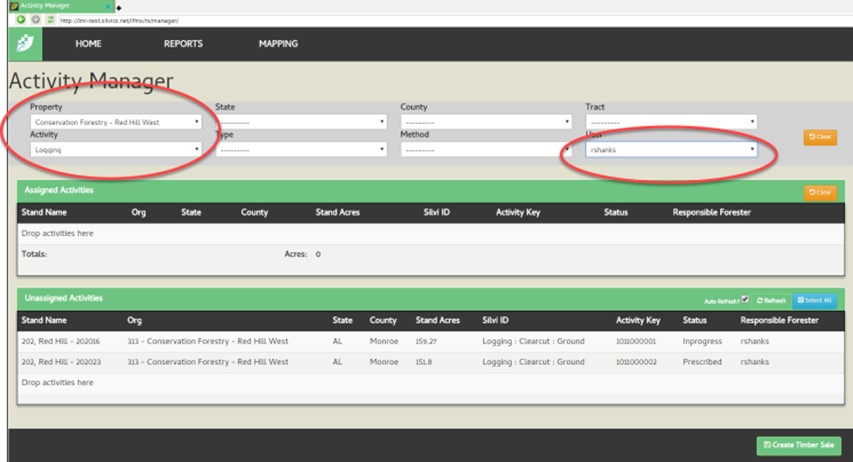
Step 4: The user can drag and drop an activity from the Unassigned Activities grid into the empty Assigned Activities grid. In the Unassigned Activities grid:
a. Left click and hold to grab one of the activities.
b. Drag the activity to the empty Assigned Activities grid above.
c. Release the left mouse button to drop the activity into the group.
Alternately, you can filter the Activities you want and send them all to an Assigned Activity Group at once by clicking the <Select All> button in the Unassigned Activities Grid.
Step 5: Now that you have grouped your Activities, you want to add them to a Timber Sale. In the Activity Manager, click the <Create Timber Sale> button in the bottom right of the web form. The Create Timber Sale dialog window opens.
Step 6: Enter appropriate Timber Sale data into the Create Timber Sale form.
Note: If you have not previously created the Sale Group to add these activities into, don’t worry! You can create the Sale Group now by clicking the green plus sign to the right of the Sale Group label in the form. Then, you can select the appropriate property and give the Sale Group a name.
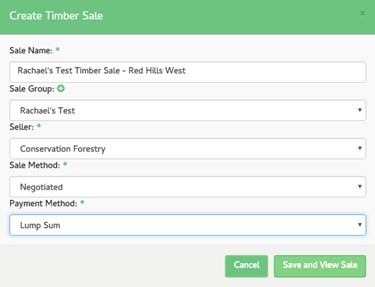
Step 7: Click <Save and View Sale>. The Timber Sale information saves and the Create Timber Sale form closes, prompting the Change Timber Sale form to open.
Step 8: In the Change Timber Sale form, you can modify additional attributes about the timber sale you just created including dates, deposits, and status as well as enter additional comments if needed. Click <Save>.

