
Add a Dynamic Data Grid to a Map Template
Overview
This page guides you through the process of incorporating a dynamic data grid into a map template. By following the steps outlined, you can enhance your map’s interactivity and data presentation, allowing users to view and manipulate data directly within the map interface.
Need More Help?
For personalized assistance tailored to your specific needs, speak with a knowledgeable customer service representative.
Workflows
First, Before Adding a Dynamic Data Grid to a Map Template
- Ensure that the feature layer of interest is selectable in the table of contents.
- Select features of interest in the Map View.
- Open the template in Page Layout View.
Add the Data Grid to the Template in Page Layout view
Step 1: In “Page Layout”, right click inside your map page.
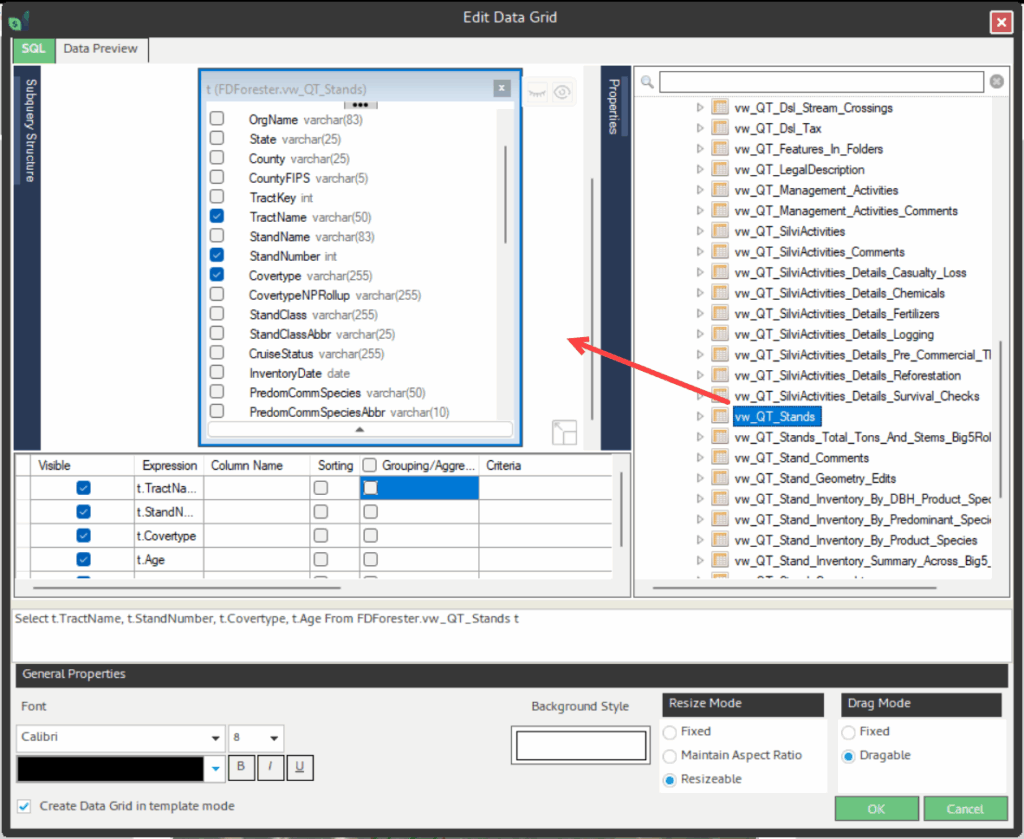
Step 2: From the context menu select “Add,” then “Data Grid” to open the Edit Data Grid dialog window.
Note: The Edit Data Grid dialog window functions in the same manner as the Query Tool. For specific information related to this please refer to the Query Tool documentation.

Step 3: On the right half of the window is the table explorer. Select the appropriate view and click and drag it into the white space on the left.
You can select any of the listed views that contain the data you wish to display in the data grid; In this example we will use the “Stands” view.
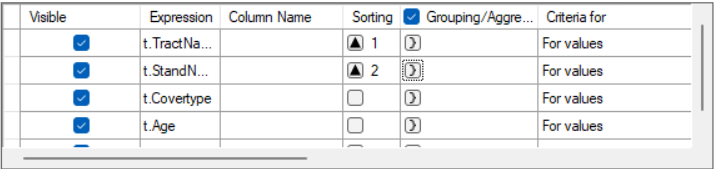
Step 4: Continuing on the left side of the window, select the fields to be added to the data grid.
Note: Field columns in the data grid will populate in the order in which the fields were selected.
Step 5: In the sort type column, select either ‘Ascending’ or ‘Descending.’
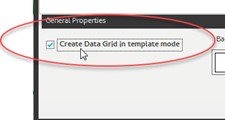
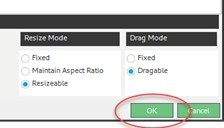
Step 6: Under “General Properties” near the bottom of the window, check the box next to “Create Data Grid in template mode.”
Note: By checking this checkbox, you will only see data for the selected feature in the map. If you wish to see data for all features in the layer, leave the checkbox unchecked.
Step 7: Finally, after adjusting the Data Grid as needed, click “OK” in the bottom right
Step 8: In the Map Template, left click on the Data Grid to select it and hold left click to drag it
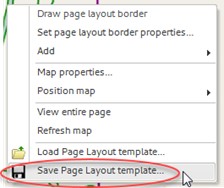
Step 10: Once the Data Grid is in the appropriate place, you are free to save your Page Layout as a Template for future use.
Open the Template in Auto Layout
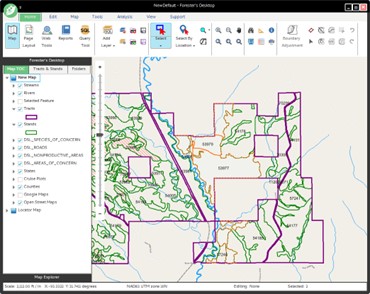
Step 1: Switch the View Frame to Map View by selecting the “Map” button in the Tool Ribbon.

Step 2: In the Map View, select the stands that you want to send to an Auto Layout.
Note: Stands do not have to be coincident. To select multiple stands that are not coincident, hold down the control key while selecting the features.
Step 3: In the Map Tab of the Ribbon, select the Auto Layout tool:
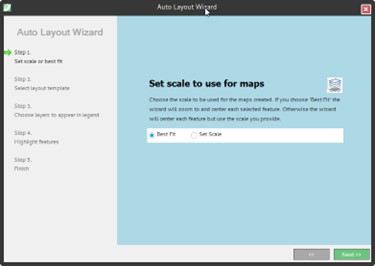
The Auto Layout tool is active and the Auto Layout wizard opens.

Step 4: Set the Scale.
- Choose “Best Fit”.
- Click the <Next>> > button.
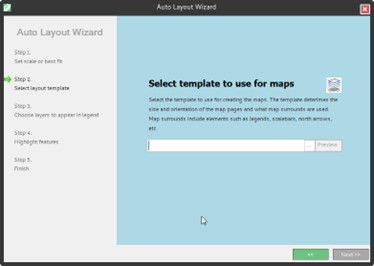
Step 5: Select a Template.
- In the Select template box, click on the ellipsis.
- Select the template you added the data grid.
- Click <OK> in the Browser.
- Click <Next>> > in the Auto Layout Wizard.
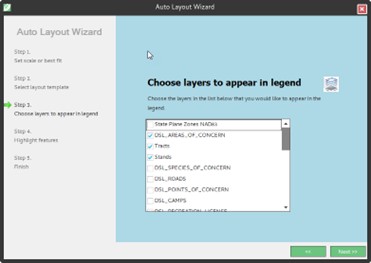
Step 6: Choose Layers for the Legend.
- In the Choose Layers to appear in legend form, select the following layers:
- Tracts
- Stands
- Any other layer you think needs to be symbolized on the map.
- Click <Next>> > in the Auto Layout Wizard.
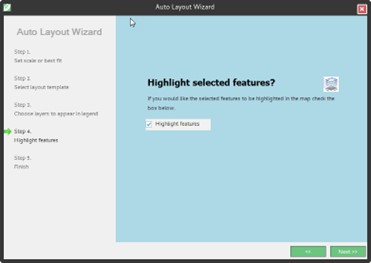
Step 7: Choose to highlight features (or not).
- Check the box to highlight the features in the template map that are highlighted in the Map View.
- Click <Next>> > in the Auto Layout Wizard.
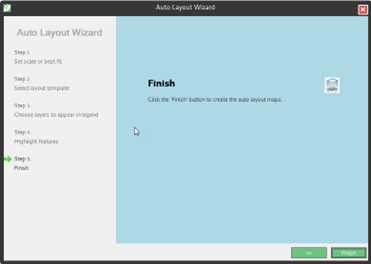
Step 8: Click <Finish> in the Auto Layout Wizard to complete the workflow.