
Update Point Selection Style
Overview
Here we will discuss how a User can Update Point Selection Styles as they desire for their Silvics Spatial Map View. Below includes a step-by-step video tutorial, as well as a typed walk-through.
Need More Help?
For personalized assistance tailored to your specific needs, speak with a knowledgeable customer service representative.
Workflows
Step-by-Step Instructions
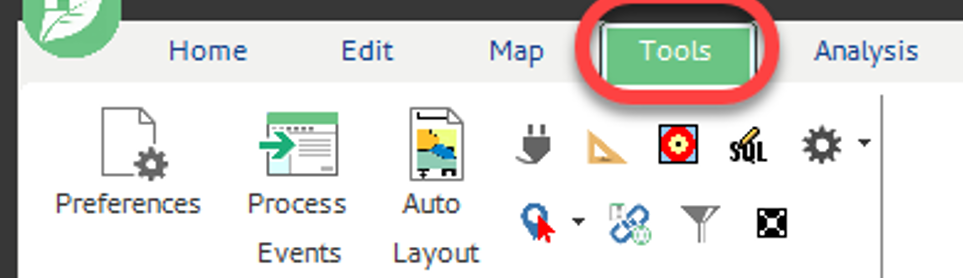
Step 1: Navigate to the Tools tab of the Ribbon.
Step 2: Click the <Preferences> tool.
The User Preferences window opens.
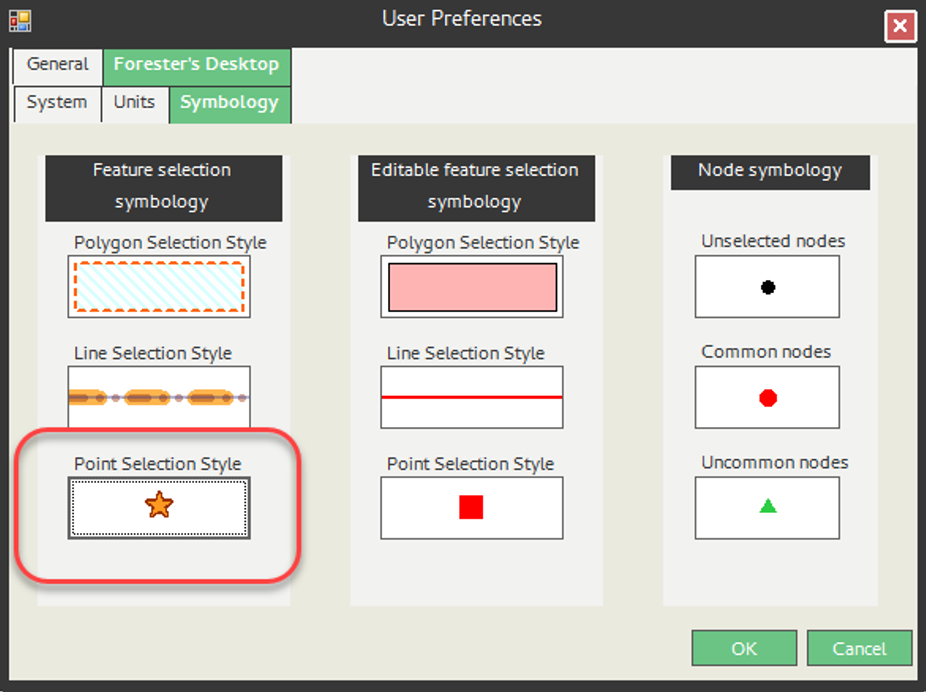
Step 3: Under the Forester’s Desktop tab, select the Symbology tab.
Note: In the Symbology tab you modify preferences for:
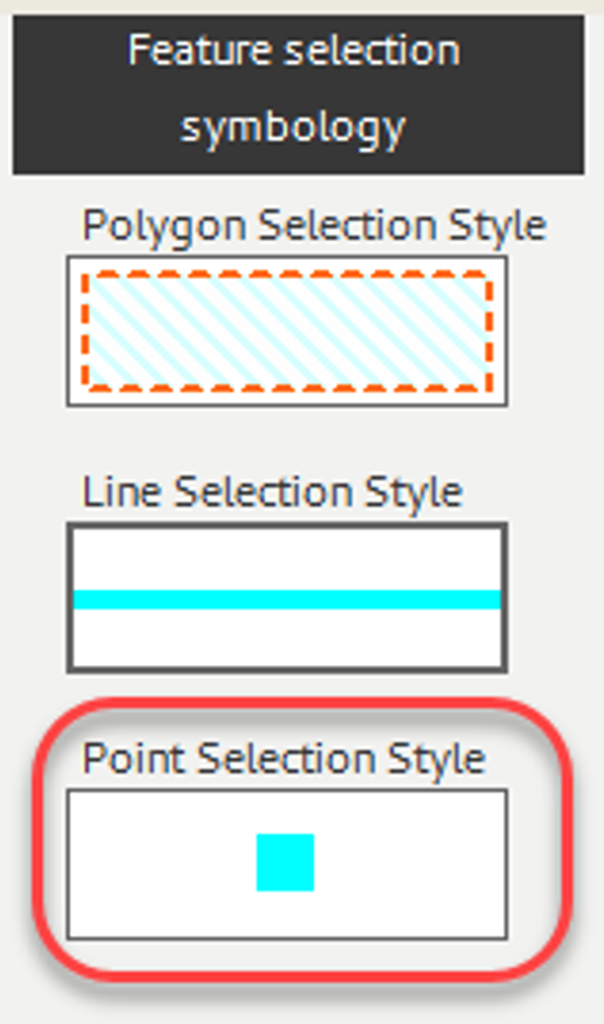
- Feature selection symbology
- Editable feature selection symbology
- Node Symbology
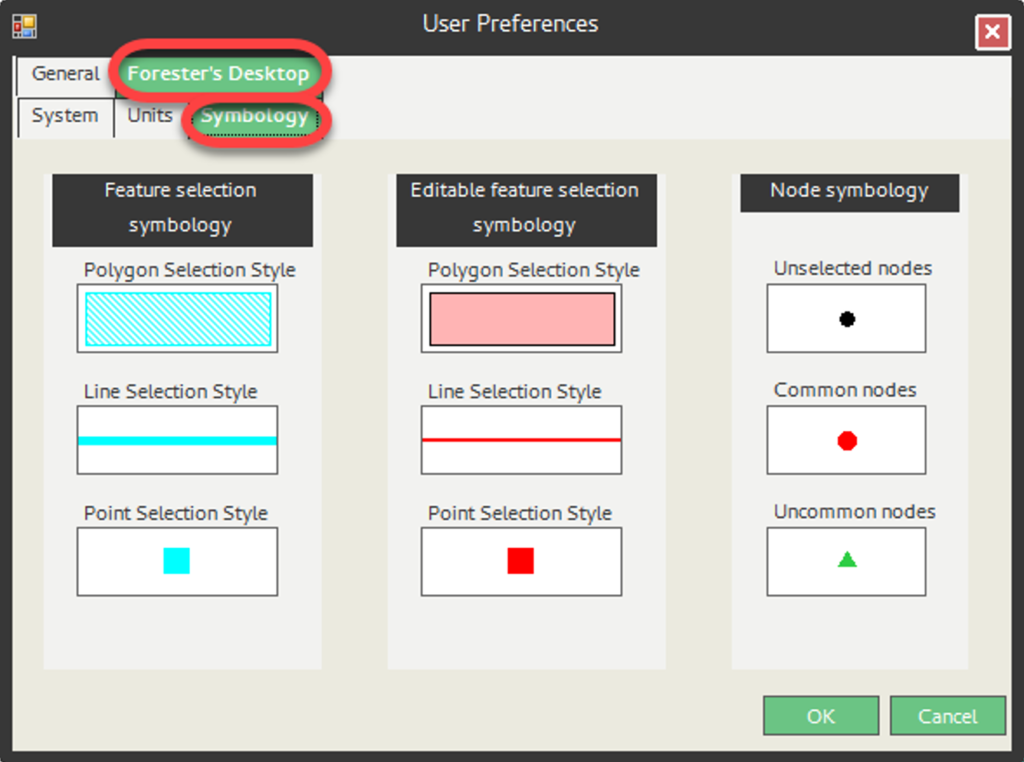
Step 4: Under the Feature Selection Symbology box, select the Point Selection Style symbol.
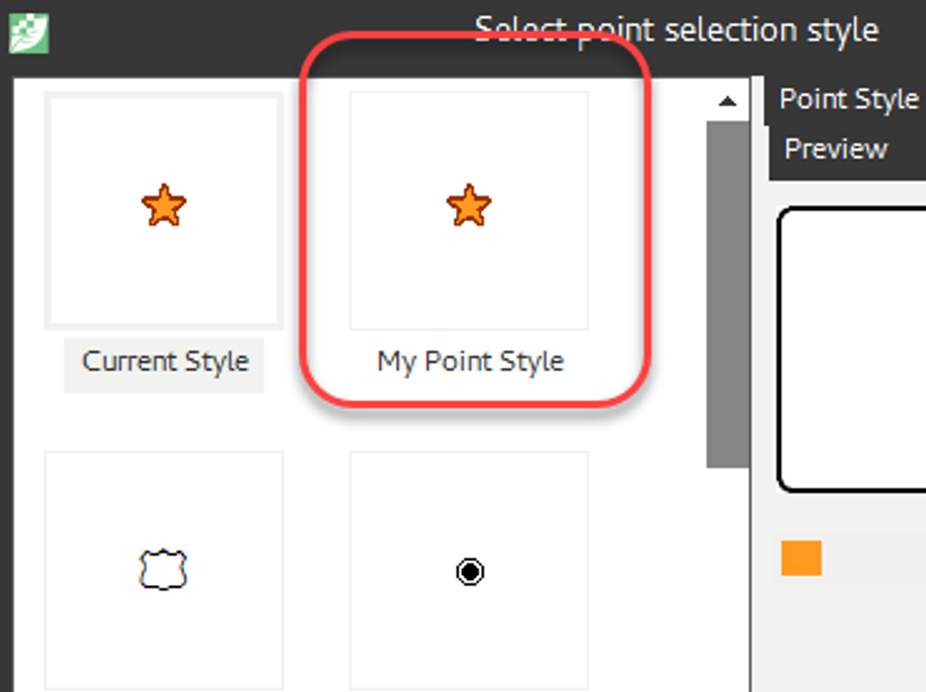
The Select Point Selection Style dialog window opens.
Step 5: To modify the point style of the selected point feature:
- In the Feature Selection Symbology box, click the symbol for “Point Selection Style”
- Select the drop down arrow to the right of the symbol style to change the shape of the point
- Under “Interior color” select the drop down arrow then select a color
- Under “Outline color” select the drop down arrow then select a color
- To modify the outline size click the up or down arrows in the Outline Size box
- To modify the point size, click the up or down arrows in the Point Size box
- Click <OK>
The Select Point Selection Style dialog window closes and the Point Selection Style symbol preview updates to reflect changes made.
Step 6: If this is a style you will use often:
- Click the <Save Point> button in the Select point selection style window
- Enter a name in the Save User-defined style popup dialog
Click <OK>.
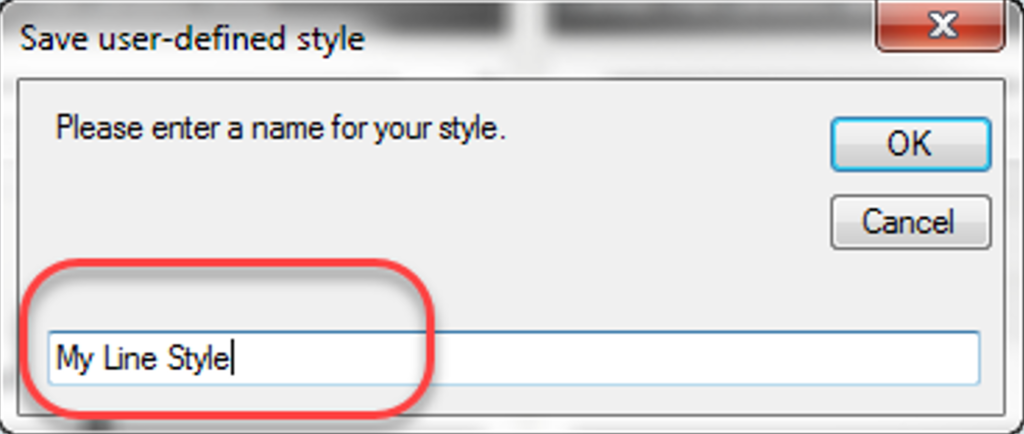
Selection style saves in the style options browser.