

Create a Management Activity – Using the Polygon Feature
Overview
In this workflow, we will use a Tract feature to demonstrate the power of prescribing management activities to the perimeter of a polygon feature using the new dynamic segmentation tool. This tool allows you to prescribe to multiple segments along the same feature’s perimeter and allows you to dynamically shift the start and end points of each activity segment if needed. Let’s walk through this workflow to give you a better understanding of what I mean.
Need More Help?
For personalized assistance tailored to your specific needs, speak with a knowledgeable customer service representative.
Workflows
Using the Polygon Feature to Create a Management Activity
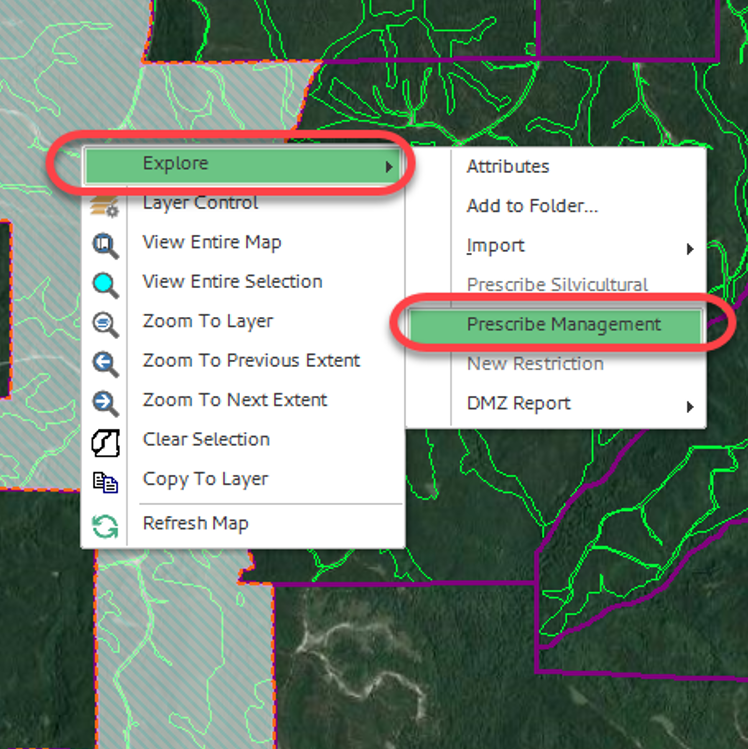
Step 1: In the Map View, select the feature you wish to prescribe activities to by left clicking on the feature using the selection tool.
Step 2: Right click in the View Frame and click on “Prescribe Management”
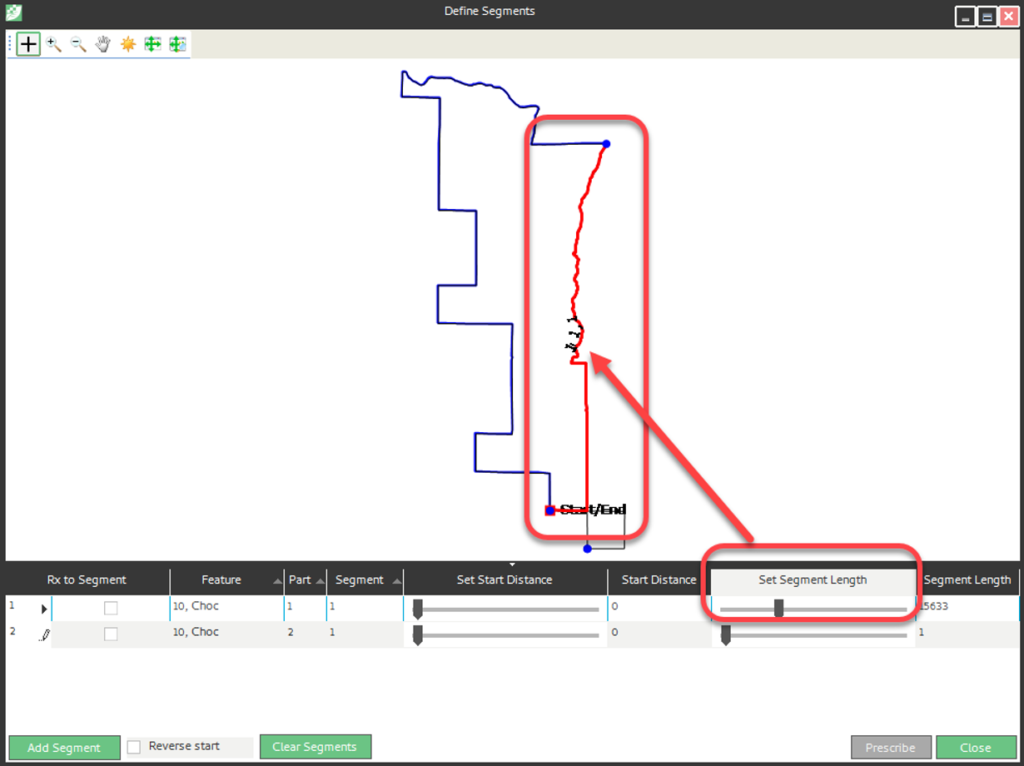
Step 3: In the Use Dynamic Segmentation dialog window, click <Yes> to using the new dynamic segmentation tools. The Define Segments window opens.
Step 4: Adjust the Set Start Distance and Set Segmentation Length using the slider provided. The highlighted portion is the only region that is affected.
You may also input an exact value under “Start Distance” and “Segment Length.”
Note: In this example this is a multipart Tract polygon, therefore two rows are automatically added to the Segment list.
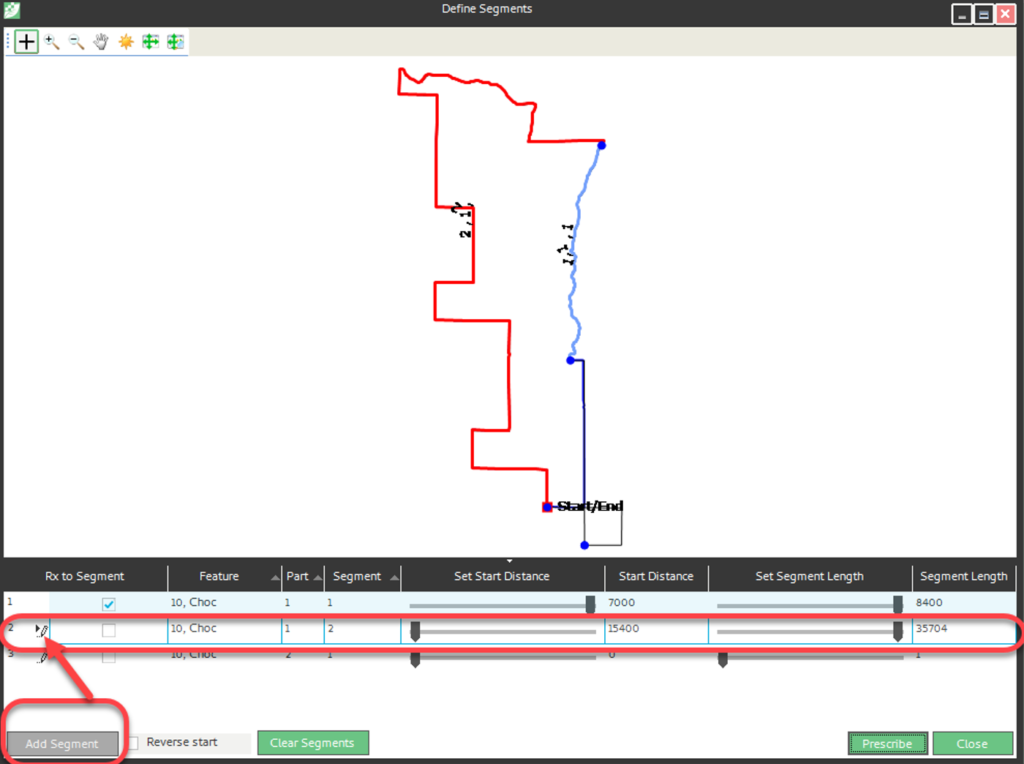
Step 5: An additional segment may be added to the feature by clicking on the <Add Segment> button in the bottom left. This segment will begin where the first ended.
If you find you need to restart your segment definition, click the <Clear Segments> button at the bottom of the window.
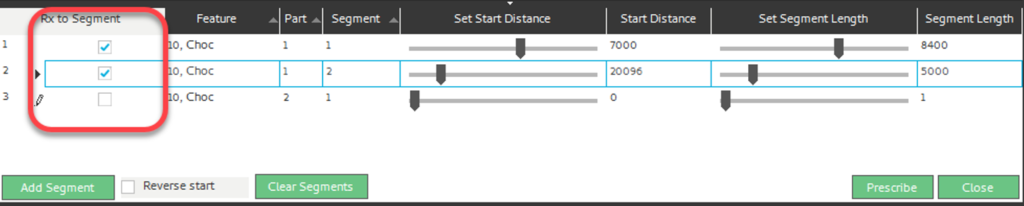
Step 6: Once your segments are the appropriate length, check the box underneath the “Rx to Segment” column header.
Step 7: In the bottom right of the window click <Prescribe> and a new activity window should appear.
The Activity-Type-Methods available in the picklist are related to the feature type selected (in this case a Tract Polygon).
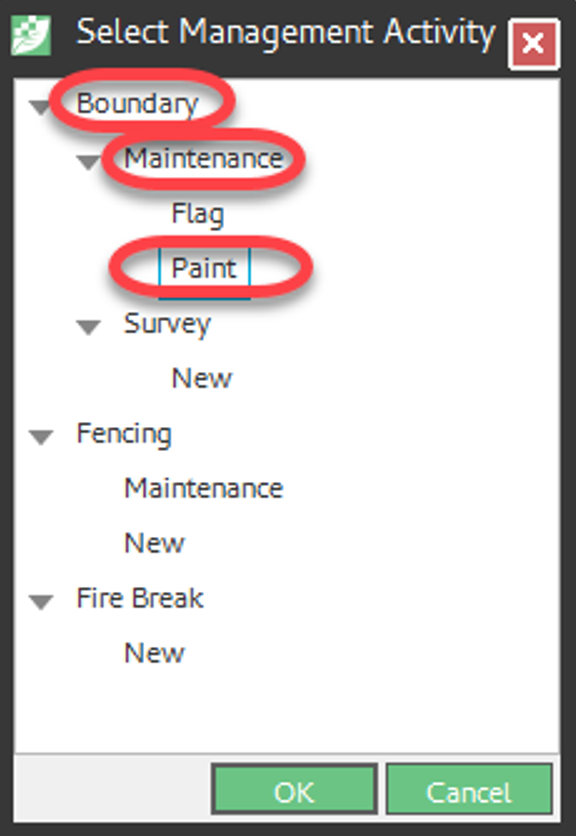
Step 8: In the new “Select Management Activity” window select the activity you would like to prescribe.
Step 9: Now, fill in the details of the activity selected.
Step 10: Once finished, click <OK> in the bottom right of the window and you will be asked if you would like to save this activity. Click <Yes> to finish, <No> to discard the activity, and to continue editing.